How to Boot ISO Files From GRUB2 Boot Loader

Last Updated: April 9th, 2021Xiao Guoan (Admin)7 CommentsDesktop Linux

출처 : https://www.linuxbabe.com/desktop-linux/boot-from-iso-files-using-grub2-boot-loader

This tutorial will be showing you how to boot ISO files stored on your hard drive with the GRUB2 boot loader. Normally you need to create a live DVD or live USB in order to boot Linux ISO images. You can do it with graphical tools or from the command line. But what if you don’t have an optical disk or USB thumb drive around, or your computer does not support burning ISO images to an optical disk?

Boot ISO Files From GRUB2 Boot Loader

GRUB to the rescue

GRUB2 (GRand Unified Bootloader) is the standard boot loader for Linux. It can boot Linux ISO image files stored on the hard drive without a USB or DVD. GRUB Legacy (version 0.x) doesn’t have this feature. Many Linux distributions can be booted directly from an ISO file.

  • GRUB2 supports many file systems, including but not limited to ext4HFS+, and NTFS, which means you can put your ISO file on any of these file systems.
  • GRUB2 can read files directly from LVM and RAID devices.
  • GRUB2 also has network support. You can load ISO images over the network by using the TFTP protocol.

To use GRUB2 to boot ISO files, you need a Linux distro with GRUB2 as the boot loader already installed on your computer. The following instructions work on both the traditional BIOS and the newer UEFI firmware. However, if you use UEFI, then you should disable secure boot in the firmware for GRUB2 to boot ISO files, otherwise, you might see the “can not find command loopback” error.

Now let’s get started.

Boot Ubuntu ISO Files From GRUB2

Log in to a computer running Linux and download an Ubuntu ISO image file. Then open up a terminal window and edit the /etc/grub.d/40_custom file with a command-line text editor like Nano.

sudo nano /etc/grub.d/40_custom

The first line of this file is #! /bin/sh indicating it’s a shell script. In this file, we can add custom entries to the GRUB boot menu.

grub 40_custom

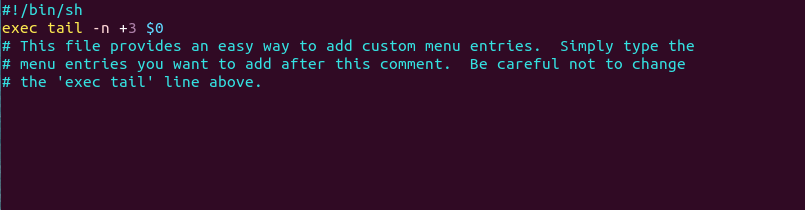
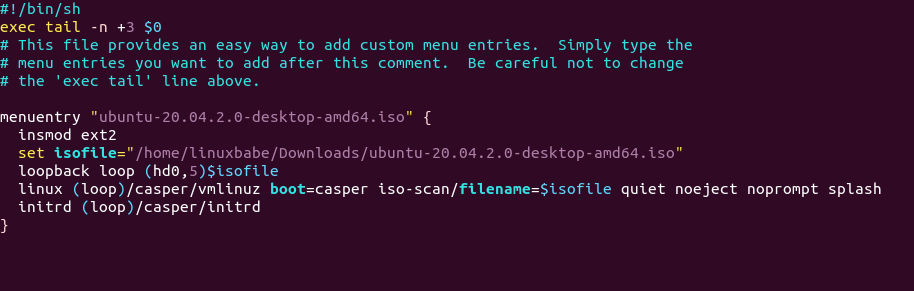
Copy and paste the following text at the end of this file.

menuentry "ubuntu-20.04.2.0-desktop-amd64.iso" {
  insmod ext2
  set isofile="/home/linuxbabe/Downloads/ubuntu-20.04.2.0-desktop-amd64.iso"
  loopback loop (hd0,5)$isofile
  linux (loop)/casper/vmlinuz boot=casper iso-scan/filename=$isofile quiet noeject noprompt splash
  initrd (loop)/casper/initrd
}
Boot ISO Files From GRUB2 Boot Loader btrfs

Where:

  • menuentry: This entry will be displayed on the GRUB2 boot menu. You can name it whatever you like.
  • The insmod command inserts a module. Since the ISO file is stored under my ext4 home dierctory, the ext2 module is needed. If it’s stored on an NTFS partition, then you need insmod ntfs instead. Note that GRUB may not be able to recognize XFS and Btrfs file system, so it’s not recommended to store the ISO file on a XFS or Btrfs partition.
  • set isofile: Specify that path of your ISO image file. Here I’m using Ubuntu 20.04 Desktop ISO file saved under the Downloads folder.
  • loopback: Mount the ISO file. hd0 means the first hard drive in the computer and 5 means the ISO file is stored on the 5th disk partition.
  • The linux command loads a Linux kernel from the specified path. casper/vmlinuz.efi is the linux kernel inside the Ubuntu ISO image.
  • The initrd command loads an initial ramdisk from the specified path. It can only be used after the linux command has been run. The initial ramdisk is a minimal root file system mounted to the RAM. casper/initrd.lz is the initrd file inside the Ubuntu ISO image.

Note that GRUB does not distinguish IDE from SCSI. In Linux kernel/dev/hda refers to the first IDE hard drive and /dev/sda refers to the first SCSI or SATA hard drive. If you use a NMVe SSD, it might be named as /dev/nvme0n1/dev/nvme1n1 and so on. But in GRUB, the first hard drive is always referred to as hd0, no matter what the interface type is. Also note that partition numbers in GRUB start at 1, not 0.

If the ISO file is stored on an extended partition of MBR disk, the partition number starts from 5, instead of 1. For example, the first logical partition inside an extended partition will be numbered as 5; the second logical partition inside an extended partition will be numbered as 6. To check your partition number, you can run lsblk or sudo parted -l command in the terminal window.

Save and close the file. (Press Ctrl+O, then press Enter to save a file in Nano text editor. Press Ctrl+X to exit.)

Then update GRUB boot menu with the following command:

sudo grub-mkconfig -o /boot/grub/grub.cfg

On Fedora, CentOS, RHEL, OpenSUSE, the command to run is:

sudo grub2-mkconfig -o /boot/grub2/grub.cfg

On Debian, Ubuntu, Linux Mint, you can use the following command to update GRUB boot menu.

sudo update-grub

You might not see the new menu entry right away, but you will see it when you reboot your computer.

sudo shutdown -r now

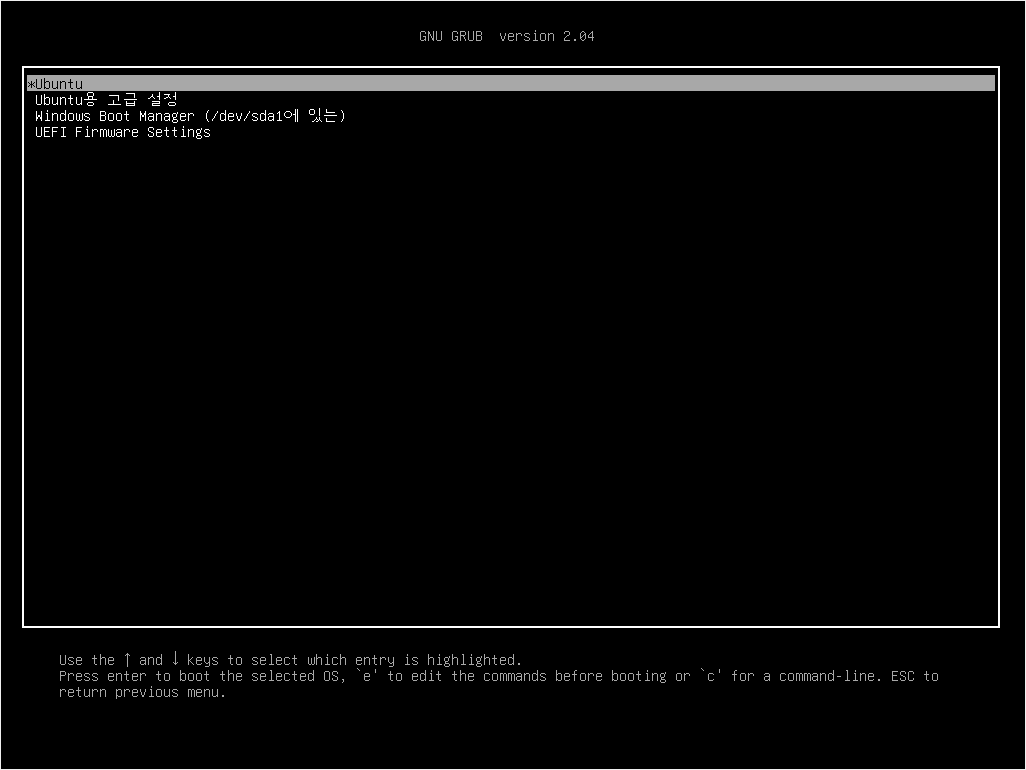
You will see your custom entry at the bottom of the GRUB2 boot menu. If GRUB couldn’t boot your ISO image, please check /etc/grub.d/40_custom file to see if there is a typo or you left out a space or something like that.

boot Ubuntu ISO file from Grub

You can add as many menu entries as you like in the /etc/grub.d/40_custom file.

Debian ISO

Download the Debian live CD ISO file. Next, open up a terminal window and edit the /etc/grub.d/40_custom file with a text editor such as Nano.

sudo nano /etc/grub.d/40_custom

In this file, we can add custom entries to the GRUB boot menu. In this case, we want to add an entry to boot a Debian ISO file.

menuentry "debian-live-10.8.0-amd64-lxqt.iso" {
  insmod ext2
  set isofile="/home/linuxbabe/Downloads/debian-live-10.8.0-amd64-lxqt.iso"
  loopback loop (hd0,5)$isofile
  linux (loop)/live/vmlinuz-4.19.0-14-amd64 boot=live findiso=$isofile
  initrd (loop)/live/initrd.img-4.19.0-14-amd64
}

Note that the vmlinuz and initrd.img file include version number. You should mount your Debian ISO file and check if you should update it. Save and close the file. Then update GRUB boot menu.

sudo grub-mkconfig -o /boot/grub/grub.cfg

or

sudo grub2-mkconfig -o /boot/grub2/grub.cfg

Arch Linux ISO

Download the Arch Linux ISO file. Next, open up a terminal window and edit the /etc/grub.d/40_custom file with a text editor such as Nano.

sudo nano /etc/grub.d/40_custom

In this file, we can add custom entries to the GRUB boot menu. In this case, we want to add an entry to boot a Arch Linux ISO file.

menuentry "archlinux-2021.03.01-x86_64.iso" {
  insmod ext2
  set isofile="/home/linuxbabe/Downloads/archlinux-2021.03.01-x86_64.iso"
  loopback loop (hd0,5)$isofile
  linux (loop)/arch/boot/x86_64/vmlinuz-linux archisolabel=ARCH_202103 img_dev=/dev/sda5 img_loop=$isofile earlymodules=loop
  initrd (loop)/arch/boot/x86_64/initramfs-linux.img
}

Note that if you download a newer Arch Linux ISO file such as archlinux-2021.04.01-x86_64.iso, then you need to update the archisolabel to ARCH_202104. You can also find out what the label should be by mounting the Arch Linux ISO in your file manager. The label will be shown in your file manager.

boot Arch Linux ISO from GRUB

Also you might need to change the value of img_dev. It’s the name of the device where your ISO file is stored.

Save and close the file. Then update GRUB boot menu.

sudo grub-mkconfig -o /boot/grub/grub.cfg

or

sudo grub2-mkconfig -o /boot/grub2/grub.cfg

Clonezilla Live ISO

Clonezilla is a free open-source and reliable tool for bare metal backup and recovery of disk drives. Download the Clonezilla live ISO file. Next, open up a terminal window and edit the /etc/grub.d/40_custom file with a text editor such as Nano.

sudo nano /etc/grub.d/40_custom

In this file, we can add custom entries to the GRUB boot menu. In this case, we want to add an entry to boot Clonezilla Live ISO file.

menuentry "clonezilla-live-20210127-groovy-amd64.iso" {
  insmod ext2
  set isofile="/home/linuxbabe/Downloads/clonezilla-live-20210127-groovy-amd64.iso"
  loopback loop (hd0,5)$isofile
  linux (loop)/live/vmlinuz boot=live findiso=$isofile
  initrd (loop)/live/initrd.img
}

Save and close the file. Then update GRUB boot menu.

sudo grub-mkconfig -o /boot/grub/grub.cfg

or

sudo grub2-mkconfig -o /boot/grub2/grub.cfg

RHEL 8/CentOS Stream ISO

First, download the ISO image file. For RHEL 8, please read the following article to learn how to download ISO image file.

CentOS Stream ISO image can be downloaded from its official website.

Next, open up a terminal window and edit the /etc/grub.d/40_custom file with a text editor such as Nano.

sudo nano /etc/grub.d/40_custom

In this file, we can add custom entries to the GRUB boot menu. In this case, we want to add an entry to boot RHEL 8/CentOS/Fedora ISO file.

menuentry "rhel-8.3-x86_64-boot.iso" {
  insmod ext2
  set isofile="/home/linuxbabe/Downloads/rhel-8.3-x86_64-boot.iso"
  loopback loop (hd0,5)$isofile
  linux (loop)/isolinux/vmlinuz noeject inst.stage2=hd:/dev/sda5:$isofile
  initrd (loop)/isolinux/initrd.img
}

In the above code, /dev/sda5 is the 5th partition of the first disk where the ISO image file is stored. Save and close the file. Then update GRUB boot menu.

sudo grub-mkconfig -o /boot/grub/grub.cfg

or

sudo grub2-mkconfig -o /boot/grub2/grub.cfg

Fedora ISO

Fedora ISO image can be downloaded from its official website. Next, open up a terminal window and edit the /etc/grub.d/40_custom file with a text editor such as Nano.

sudo nano /etc/grub.d/40_custom

In this file, we can add custom entries to the GRUB boot menu. In this case, we want to add an entry to boot Fedora ISO file.

menuentry "Fedora-Workstation-Live-x86_64-33-1.2.iso" {
  insmod ext2
  set isofile="/home/linuxbabe/Downloads/Fedora-Workstation-Live-x86_64-33-1.2.iso"
  loopback loop (hd0,5)$isofile
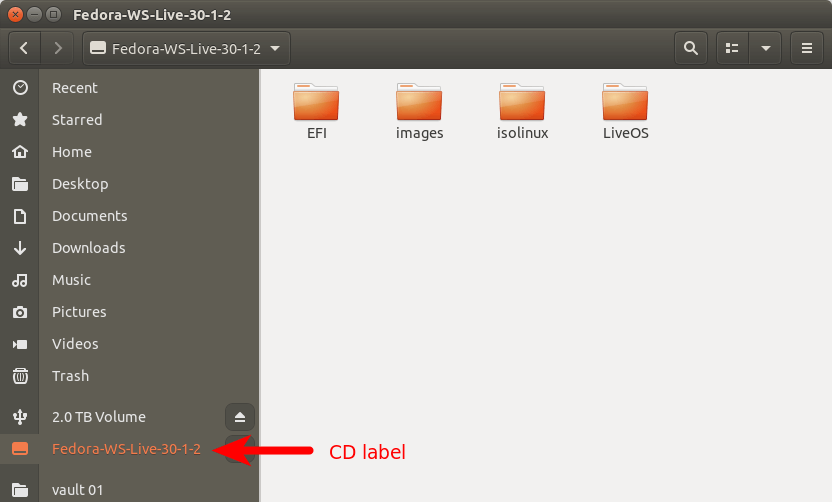
  linux (loop)/isolinux/vmlinuz root=live:CDLABEL=Fedora-WS-Live-33-1-2 rd.live.image verbose iso-scan/filename=$isofile
  initrd (loop)/isolinux/initrd.img
}

In the above code, CDLABEL is the the label displayed in your file manager when the ISO image is mounted.

Fedora ISO image CD label

Save and close the file. Then update GRUB boot menu.

sudo grub-mkconfig -o /boot/grub/grub.cfg

or

sudo grub2-mkconfig -o /boot/grub2/grub.cfg

OpenSUSE Leap Live ISO

Download the OpenSUSE Leap live ISO file. Next, open up a terminal window and edit the /etc/grub.d/40_custom file with a text editor such as Nano.

sudo nano /etc/grub.d/40_custom

In this file, we can add custom entries to the GRUB boot menu. In this case, we want to add an entry to boot OpenSUSE Leap Live ISO file.

menuentry "openSUSE-Leap-15.2-KDE-Live-x86_64-Build31.383-Media.iso" {
  insmod ext2
  set isofile="/home/linuxbabe/Downloads/openSUSE-Leap-15.2-KDE-Live-x86_64-Build31.383-Media.iso"
  loopback loop (hd0,5)$isofile
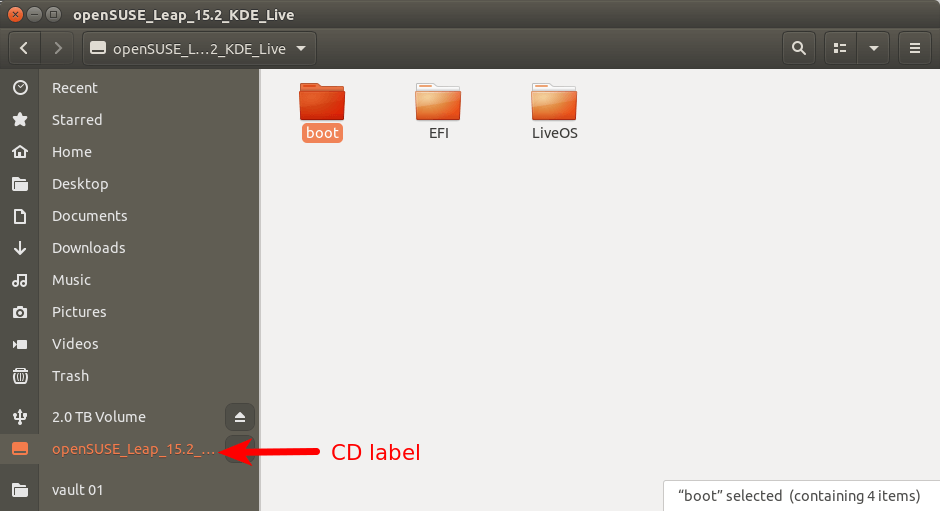
  linux (loop)/boot/x86_64/loader/linux boot=isolinux root=live:CDLABEL=openSUSE_Leap_15.2_KDE_Live rd.live.image verbose iso-scan/filename=$isofile
  initrd (loop)/boot/x86_64/loader/initrd
}

In the above code, CDLABEL is the the label displayed in your file manager when the ISO image is mounted.

opensuse leap live cd label

Save and close the file. Then update GRUB boot menu.

sudo grub-mkconfig -o /boot/grub/grub.cfg

or

sudo grub2-mkconfig -o /boot/grub2/grub.cfg

Kali Linux Live ISO

Download the Kali Linux live ISO file. Next, open up a terminal window and edit the /etc/grub.d/40_custom file with a text editor such as Nano.

sudo nano /etc/grub.d/40_custom

In this file, we can add custom entries to the GRUB boot menu. In this case, we want to add an entry to boot a Kali Linux Live ISO file.

menuentry "kali-linux-2021.1-live-amd64.iso" {
  insmod ext2
  set isofile="/home/linuxbabe/Downloads/kali-linux-2021.1-live-amd64.iso"
  loopback loop (hd0,5)$isofile
  linux (loop)/live/vmlinuz boot=live findiso=$isofile
  initrd (loop)/live/initrd.img
}

Save and close the file. Then update GRUB boot menu.

sudo grub-mkconfig -o /boot/grub/grub.cfg

or

sudo grub2-mkconfig -o /boot/grub2/grub.cfg

Linux Mint Live ISO

Download the Linux Mint ISO file. Next, open up a terminal window and edit the /etc/grub.d/40_custom file with a text editor such as Nano.

sudo nano /etc/grub.d/40_custom

In this file, we can add custom entries to the GRUB boot menu. In this case, we want to add an entry to boot a Linux Mint ISO file.

menuentry "linuxmint-20.1-cinnamon-64bit.iso" {
  insmod ext2
  set isofile="/home/linuxbabe/Downloads/linuxmint-20.1-cinnamon-64bit.iso"
  loopback loop (hd0,5)$isofile
  linux (loop)/casper/vmlinuz boot=casper iso-scan/filename=$isofile quiet noeject noprompt splash
  initrd (loop)/casper/initrd.lz
}

Save and close the file. Then update GRUB boot menu.

sudo grub-mkconfig -o /boot/grub/grub.cfg

or

sudo grub2-mkconfig -o /boot/grub2/grub.cfg

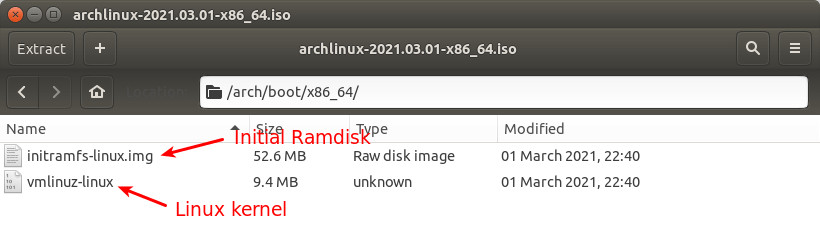
Finding Out the Linux kernel and initrd File Name

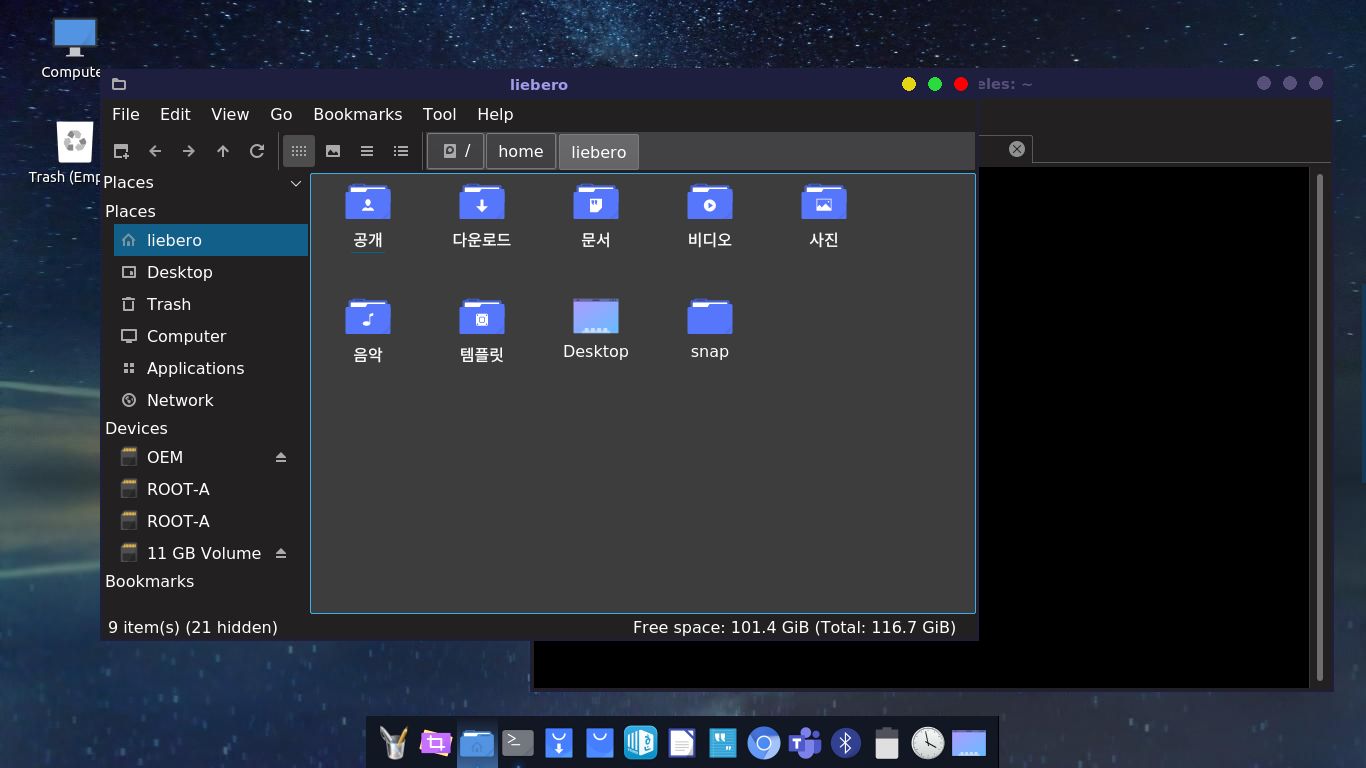
The Linux kernel and initrd (initial ramdisk) file can be different for different Linux ISO images. For Ubuntu, the Linux kernel is located at /casper/vmlinuz and the initrd image file is located at /casper/initrd. If you don’t know where they are located, just open your ISO image with archive manager. The following screenshot shows the Arch Linux ISO image file.

Grub Initial ramdisk file

Display GRUB Boot Menu

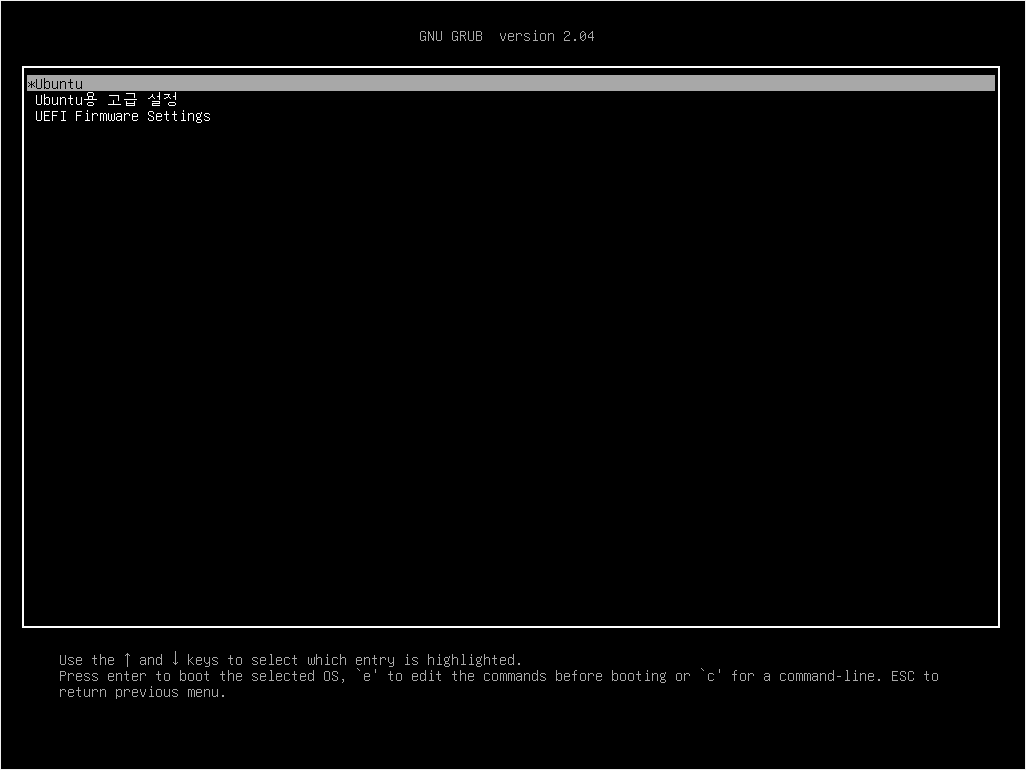
Some Linux distributions like Ubuntu hide the GRUB boot menu if there’s only one OS installed on the hard drive. To show the GRUB boot menu, edit a configuration file.

sudo nano /etc/default/grub

Find the following line, which tells GRUB to hide the boot menu.

GRUB_TIMEOUT_STYLE=hidden

Add the # character at the beginning to comment out this line.

#GRUB_TIMEOUT_STYLE=hidden

Then find the following line.

GRUB_TIMEOUT=0

Change 0 to 10, so you will have 10 seconds to choose an entry in the GRUB boot menu.

GRUB_TIMEOUT=10

Save and close the file. Then update GRUB configurations.

sudo update-grub

Change the Boot Order in GRUB

Let’s say you want to boot into the ISO by default in GRUB, then edit the configuration file.

sudo nano /etc/default/grub

Find the following line, which makes GRUB select the first entry in the boot menu.

GRUB_DEFAULT=0

Change it to something like this:

GRUB_DEFAULT="clonezilla-live-20210127-groovy-amd64.iso"

If the /etc/grub.d/40_custom file has this entry menuentry "clonezilla-live-20210127-groovy-amd64.iso", then GRUB will select this entry by default. Update GRUB for the changes to take effect.

sudo update-grub

You can also keep the default boot order, but boot an ISO file for the next boot only with:

sudo grub-reboot clonezilla-live-20210127-groovy-amd64.iso

or

sudo grub2-reboot clonezilla-live-20210127-groovy-amd64.iso

Then reboot.

sudo shutdown -r now

Additional Tips

If you have a SATA disk and an NVMe SSD inside your computer, the SATA disk is the first and the NVMe SSD is the second. The same goes for a USB drive and an NVMe SSD. If you have an optical disk, then GRUB might think the optical disk is the first disk.

If you see the following error when GRUB trying to boot an ISO image file, it likely that you have specified the ISO file location to an optical disk.

can not get C/H/S value

If you have a file system that spans the entire disk, then you don’t need to specify the partition number in GRUB. For example, I have an ISO file on my second disk. I didn’t make any partitions on the second disk, so I can specify (hd1) in GRUB configuration file.

 loopback loop (hd1)$isofile

If you see an error message like below when updating the GRUB boot menu, you can ignore this error.

grub-probe: error: cannot find a GRUB drive for /dev/loop11p3. Check your device.map.

Windows 10 ISO

Yes, you can create a Windows 10 bootable USB on Ubuntu or any Linux distro. If you don’t have a USB thumb drive, you can boot Windows 10 ISO on the hard drive with GRUB2. Download the Windows 10 ISO file. Note that you might not be able to download the ISO from this link on a Windows computer. This download link is visible to users on Linux computer.

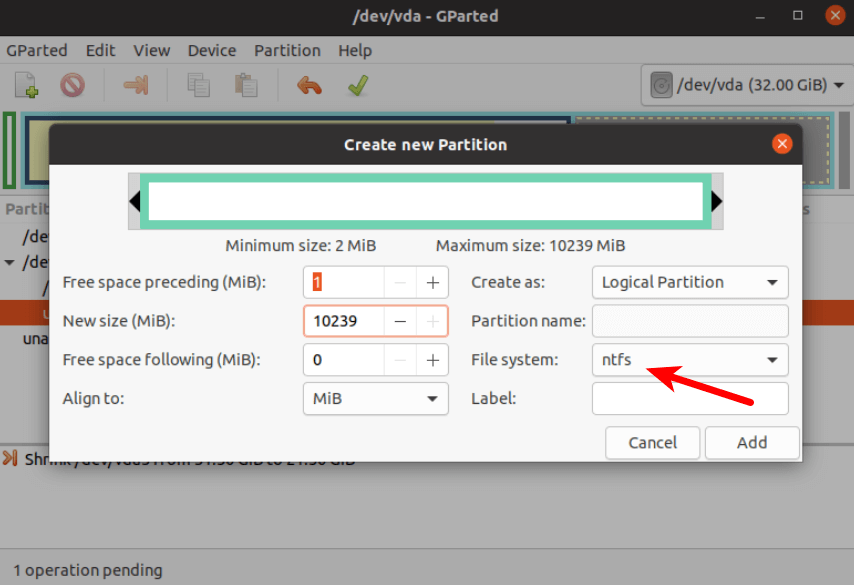
GRUB2 can not boot Windows 10 ISO directly. You need to create a separate NTFS partition on your disk with a partition editor like GParted and extract the Windows 10 ISO to that partition. The latest Windows 10 ISO file is 5.8G. The new NTFS partition should be at least 7G and it should not be used to store any other files.

GRUB boot Windows 10 ISO BIOS

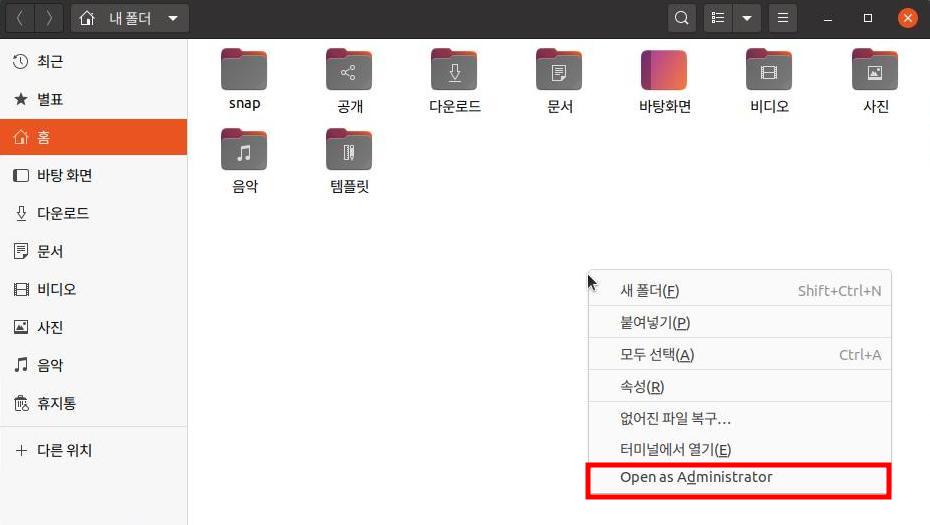
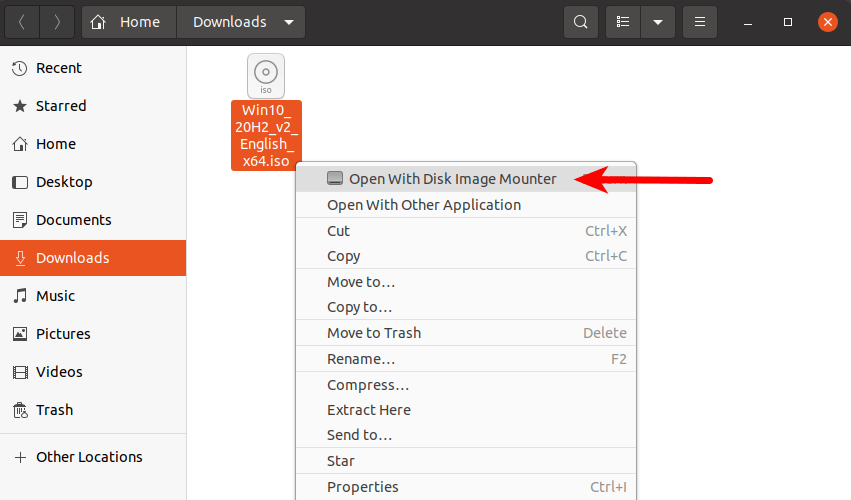
Then find your Windows 10 ISO in file manager. Open it with disk image mounter.

ubuntu mount windows 10 ISO image

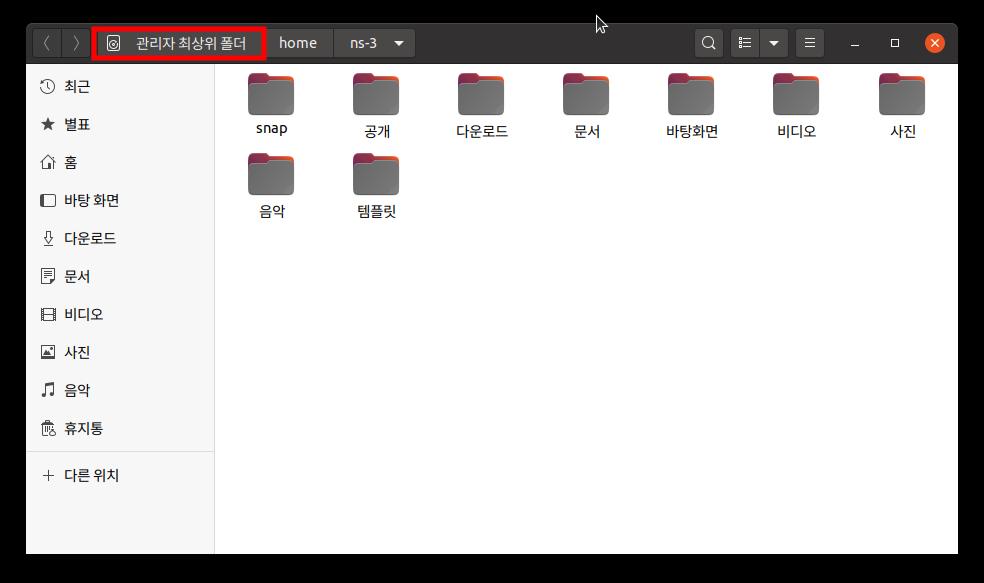
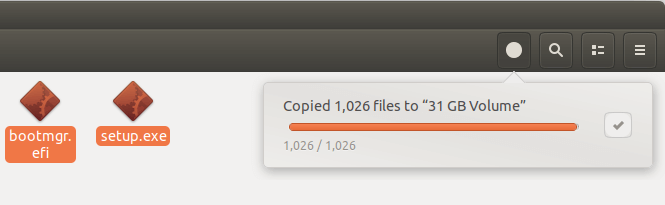
Open the mounted file system. Select all files and folders and copy them to the NTFS partition.

GRUB2 boot Windows 10 ISO

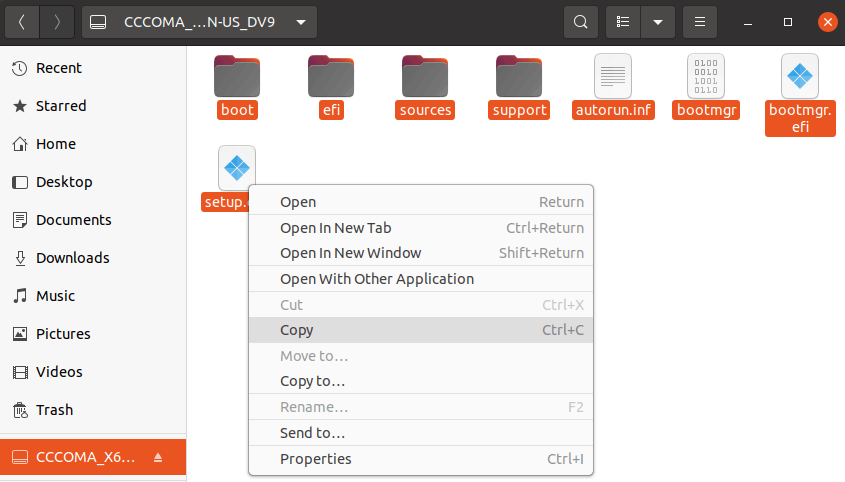
Sometimes the file manager on Ubuntu hangs and it seems that the copy operation has stopped. Actually, it’s working. Just be patient. When you see a checkmark, it means the copy operation has finished.

windows 10 bootable usb creator linux

Next, open up a terminal window and edit the /etc/grub.d/40_custom file with a text editor such as Nano.

sudo nano /etc/grub.d/40_custom

In this file, we can add custom entries to the GRUB boot menu. In this case, we want to add an entry to boot the Windows 10 installer. If your computer still uses the traditional BIOS firmware, then add the following text in this file.

menuentry "Windows-10-Installer.iso" {
  set root=(hd0,6)
  insmod part_msdos
  insmod ntfs
  insmod ntldr
  #uncomment the following line if your computer has multiple hard drives. 
  #drivemap -s (hd0) ${root}
  ntldr /bootmgr
}

My NTFS partition number is 6, so I use (hd0,6) as the root. You can run sudo parted -l command to check your NTFS partition number. If your computer has multiple hard drives, use the drivemap command to set the partition (hd0,6) as the first hard disk, so Windows will be able to boot.

If your computer uses UEFI firmware, then add the following text in this file.

menuentry "Windows-10-Installer.iso" {
  set root=(hd0,6)
  insmod part_gpt
  insmod ntfs
  insmod chain
  chainloader /efi/boot/bootx64.efi
}

Save and close the file. Then update GRUB boot menu.

sudo grub-mkconfig -o /boot/grub/grub.cfg

or

sudo grub2-mkconfig -o /boot/grub2/grub.cfg

Unplug all your external USB storage devices, then reboot your computer. Note that the Windows desktop ISO installer doesn’t work properly on Proxmox KVM virtual machines.

Wrapping Up

I hop this tutorial helped you boot ISO files with GRUB2 boot loader. As always, if you found this post useful, then subscribe to our free newsletter to get more tips and tricks. Take care 🙂

[리눅스(Linux)][우분투(Ubuntu)20.04]관리자 권한 폴더 열기

1. 터미널 창에서 관리자 권한 폴더 접근

  sudo su

2. GUI에서 관리자 권한 폴더 접근 

1) 플러그인 설치

 터미널에 sudo apt install nautilus-admin -y 입력

2) 관리자 권한 플러그인 실행

  터미널에 nautilus -q 입력

3) 폴더에서 마우스 오른쪽 클릭해서, Open as Administrator 클릭

4) 로그인 암호 입력 및 완료

   관리자 최상위 폴더 보임.

How grub2 works on a MBR partitioned disk and GPT partitioned disk?

There are actually four common (or at least semi-common) cases:

  • BIOS-mode GRUB on MBR — This is the traditional PC configuration. In it, GRUB is split into multiple stages. The first stage resides in the first 440 bytes of the Master Boot Record (MBR). This first stage then loads and executes a second stage of GRUB, which typically resides in the sectors immediately following the MBR. This space is officially unallocated on most MBR disks, so putting GRUB code there is a bit risky; but it usually works OK. Additional code resides in files, typically in the /boot/grub directory of the OS used to install GRUB. There are numerous variants on this configuration possible. For instance, putting the GRUB first stage in a Partition Boot Record (PBR; the first sector of a partition) was once popular, but is pretty uncommon today, and in fact I’m not 100% sure that modern GRUB 2 still supports this option.
  • BIOS-mode GRUB on GPT — In this variant, the first stage of GRUB still resides in the MBR (which for GPT is known as a protective MBR, which primarily exists to stop GPT-unaware tools from messing with the disk). The sectors following the MBR on a GPT disk, though, are GPT data structures and so cannot be used by GRUB. Instead, GRUB 2 relies on a partition known as the BIOS Boot Partition, which has a GPT type code of 21686148-6449-6E6F-744E-656564454649 (“bios_grub flag” set in libparted-based tools, or type EF02 in GPT fdisk). Additional files reside in the /boot/grub directory, as with BIOS/MBR GRUB installations.
  • EFI-mode GRUB on MBR — In this configuration, the first GRUB code resides in a GRUB EFI binary stored on the EFI System Partition (ESP; type code 0xEF on an MBR disk). This file could be named anything, but it’s typically called grubx64.efi in a subdirectory of EFI named after the distribution (such as EFI/ubuntu/grubx64.efi), or sometimes EFI/BOOT/bootx64.efi (the “fallback filename,” most commonly used on bootable external media like USB drives). As with BIOS-mode GRUB, additional configuration and driver files reside elsewhere, typically in /boot/grub on the installation OS; however, some distributions put these file on the ESP alongside the main GRUB binary. Note that this is the least common of the four configurations, since few EFI-based computers boot from MBR disks.
  • EFI-mode GRUB on GPT — This configuration is just like EFI-mode on MBR, except that the ESP has a type code of C12A7328-F81F-11D2-BA4B-00A0C93EC93B (“boot flag” set on libparted-based tools, or type EF00 in GPT fdisk). This configuration is rapidly becoming the most common one, as the transition from BIOS to EFI is proceeding quickly.

In addition to these cases, there are less common ones involving more exotic firmware and partition tables.

As you can see, there’s considerable variability in the details, and some details vary depending on your Linux distribution — or how you set up the details yourself, if you’re installing GRUB manually from source code.

루분투(lubuntu)20.04 설치후 한일…//펌글

현재 화면

과거 서브컴퓨터로 사용하던 2016년산 크롬북 MicroSD에 우분투를 설치하였더니 무거워서 제대로 돌아가지 않았다. 주분투(xubuntu)도 약간 어색한 면이 없지 않았다.

그래서 루분투(lubuntu)를 설치하였는데 돌아가는 것이 대만족이다.

물론 MicroSD에 넣고 사용하기 때문에 부팅은 1분이나 걸린다.

우분투가 1분 45초정도 걸린것에 비하면 무척 빠르긴 하지만 SD카드이기 때문에 부팅은 느리다.

그러나 부팅후의 속도는 신규노트북 못지 않게 빠르다.

물론 서브용으로 외부에 부담없이 가지고 다니며 문서작업정도 하는 수준이라 필요한 것이 별로 없다.

그래도 대만족이다.

몇가지 입맞에 맞고 수정하여 사용중이나 그대로 사용해도 문제 없다.

그냥 SSD에 설치한다면 쿠분투의 kde plasma 환경에서 사용하겠지만 그럴 필요까지는 못느낀다.

물론 쿠분투(Kubuntu)에서 사용하는 kde plasma를 가장 좋다고 생각한다.

한마디로 중무장한 것과 소총한자루 비교하는 정도로 쿠분투를 좋아하지만 SD에서는 돌려보니 무리라서 있는 그대로 사용한다.

lubuntu는 LXQT로 전환하여 Qt를 사용하면서 창관리자로 kde를 추가작업없이 사용 가능하다.

1. 루분투 20.04버전에서 한글 설정   

– 기본 설치된 fcitx에서는 한글이 되지 않는다. 한글패키지가 설치되어 있지 않다. 

sudo apt install fcitx-hangul  

– 리부팅하면 바로 한영전화 및 한글이 잘 된다. (전환키는 Ctl+Space) 

2. 한글뷰어 설치 – 의존성 에러 발생, 해결방법 

– 한컴에서 뷰어 다운로드 

https://www.hancom.com/cs_center/csDownload.do

– 의존성 해결 

sudo apt-get update 후 패키지 다운로드 

https://www.ubuntuupdates.org/ 에서 패키지 다운로드 

          출처> https://yurmu.tistory.com/5?category=877519 

중간중간 안되면 sudo apt –f install 으로 의존성 문제를 해결한다. 

 (-f는 망가진 의존성 패키지를 정정해 준다.) 

필요 패키지를 추가로 깔아주거나 삭제해 준다. 

– 마지막으로 다운받은 한컴뷰어를 설치해 준다. 

sudo dpkg -i hancomoffice-hwpviewer-Ubuntu-amd64.deb 

3. PlankDock 설치 및 설정 

* kde 사용시 latte독 설치 (latte독 설치시 kde plasma가 창관리자로 돌아간다.) 

4. 전체 다크모드로 전환 

출처 : https://discourse.lubuntu.me/t/lubuntu-20-04-fully-dark-theme-background-windows-too/1219/2 

1) qt5ct 설치 

sudo apt-get install qt5ct 

2) LXQT Session Settings 에 아래 내용 추가 

QT_PLATFORM_PLUGIN 

QT_QPA_PLATFORMTHEME 

두가지 모두 값은 qt5ct 로 설정 

3) 터미널에서 qt5ct 실행 

4) Appearance 에서 Custom – darker 로 설정 

5. 테마 설정 

6. 검색도구 설치 및 설정 

– 검색도구로 Albert 설정 및 사용 (맥의 Alfred를 대체) 

7. Liberoffice 도 다크모드로 전환 

1) 도구->옵션 ->응용 프로그램 색상선택, 문서배경 및 신청배경으로 검정 or Automatic 설정 

2) 도구-> 옵션 -> 보기 에서 아이콘스타일 변경 

8. 기타 

– 화면캡처 : 출처> https://webnautes.tistory.com/513 

Alt + Print Screen 키를 누르면 현재 활성화된 윈도우만 캡쳐되어 사진 폴더에 저장됩니다.  

Shift + Print Screen 키를 누르면 마우스 커서가 십자 모양으로 바뀌며  캡처 하려는 영역을 사각형으로 지정하여 캡처할 수 있습니다.  

캡쳐 결과는 사진 폴더에 저장됩니다.  

Ctrl + Alt  + Shift + R키를 누르면 전체 화면을 동영상 녹화할 수 있습니다.  

녹화가 시작되면 화면 오른쪽 위에 오렌지색 원이 보이며  

한번 더 Ctrl + Alt  + Shift + R 키를 누르면 녹화가 중지됩니다.  

SSH 접속 테스트

이제 홈 네트워크의 다른 PC에서 접속을 테스트해보면 됩니다. 운영체제 별로 다음 애플리케이션이나 같은 기능을 하는 가상 터미널 앱을 실행해주세요.

다음 명령어로 SSH 서버에 접속할 수 있습니다.

ssh -p [SSH_PORT] [NAS_ID]@[NAS_IP]

예를 들어 NAS IP가 192.168.0.39이고, ID가 lainyzine, SSH 포트는 2022로 설정했다면 다음과 같이 실행하면 됩니다. Password를 물어보면 일단 SSH 서버가 동작하고 있다는 의미입니다. NAS 계정의 비밀번호를 입력해줍니다.

$ ssh -p 2022 lainyzine@192.168.0.39
lainyzine@192.168.0.39's password:

Synology strongly advises you not to run commands as the root user, who has
the highest privileges on the system. Doing so may cause major damages
to the system. Please note that if you choose to proceed, all consequences are
at your own risk.

lainyzine@my-synology-nas:~$ 

로그인에 성공하면 가능하면 root 계정을 사용하는 것을 권장하지 않는다는 경고 메시지가 나타납니다. 이어서 NAS 셸의 프롬프트가 나타납니다. 이제 SSH로 NAS에서 작업하면 됩니다.

윈도우의 경우 PowerShell에 ssh 명령어가 없는 경우, PowerShell을 관리자 권한으로 실행해서 OpenSSH 클라이언트를 먼저 활성화해주어야합니다.

리눅스민트 데스크탑 및 노트북에서 설치하기…

Windows11
그외설정

savedefault
insmod part_gpt
insmod fat
set root=’hd0,gpt1′
if [ x$feature_platform_search_hint = xy ]; then
search –no-floppy –fs-uuid –set=root –hint-bios=hd0,gpt1 –hint-efi=hd0,gpt1 –hint-baremetal=ahci0,gpt1 D4F5-1C76
else
search –no-floppy –fs-uuid –set=root D4F5-1C76
fi
chainloader /EFI/Microsoft/Boot/bootmgfw.efi

스크립트로 처음에 넣어볼까..스크립트로 넣고 새로고침하니 오고있는중으로 뭐가 나오고..

항목편집기의 네임에..#text 들어있고..…아래에 스크립트 다시 복사해서 한번더 넣어주고.. 저장 재부팅하면 다음부터는 네임에 반영되어있음..

이놈은 데스크탑용…

테마는 사이버 펑크…로 지정했음…
menuentry “Android-x86-r9.0-k49” –class android –class arch {
set root='(hd2,3)’
linux /android-9.0-r2/kernel quiet root=/dev/ram0 androidboot.selinux=permissive buildvariant=userdebug SRC=/android-9.0-r2
initrd /android-9.0-r2/initrd.img
}

이놈은 노트북용…

menuentry “Android-x86-r9.0” –class android –class arch {
set root='(hd0,1)’
linux /android-9.0-r2/kernel quiet root=/dev/ram0 vmalloc=192M SRC=/android-9.0-r2
initrd /android-9.0-r2/initrd.img
}

ex)

menuentry “Lineage x86” {
set root='(hdX,Y)’
linux /cm-x86-14.1-rc1/kernel quiet root=/dev/ram0 androidboot.selinux=permissive acpi_sleep=s3_bios,s3_mode SRC=/cm-x86-14.1-rc1
initrd /cm-x86-14.1-rc1/initrd.img
}

hdX,Y here is the name of your partition where Android is installed. My installed partition is sda9, so the entry will be hd0,9. For sdb5 the entry would be hd1,5 and so on.

Linux Mint
그외설정

recordfail
savedefault
load_video
gfxmode $linux_gfx_mode
insmod gzio
if [ x$grub_platform = xxen ]; then insmod xzio; insmod lzopio; fi
insmod part_gpt
insmod ext2
set root=’hd2,gpt4′
if [ x$feature_platform_search_hint = xy ]; then
search –no-floppy –fs-uuid –set=root –hint-bios=hd2,gpt4 –hint-efi=hd2,gpt4 –hint-baremetal=ahci2,gpt4 675a7c20-5b9f-4ef3-9205-1834664ec78e
else
search –no-floppy –fs-uuid –set=root 675a7c20-5b9f-4ef3-9205-1834664ec78e
fi
linux /boot/vmlinuz-5.4.0-74-generic root=UUID=675a7c20-5b9f-4ef3-9205-1834664ec78e ro quiet splash $vt_handoff
initrd /boot/initrd.img-5.4.0-74-generic

컨키..
유튜브에서 conky-manager설치하는법…
1) wget http://launchpadlibrarian.net/340091846/realpath_8.26-3ubuntu4_all.deb https://github.com/teejee2008/conky-manager/releases/download/v2.4/conky-manager-v2.4-amd64.deb
2) sudo apt install conky
3) sudo dpkg -i realpath_8.26-3ubuntu4_all.deb conky-manager-v2.4-amd64.deb
4) sudo apt install -f

그리고 컨키매니저 실행하면.됨…

한글깨질때…3번 보고 설치한 것임..

홈폴더에서 숨김파일 보기 하고..
.conky아래 Gotham(사용하는것)폴더내의 고담을 데디터로 열어서..

폰트에 GE Inspira 를 GE_Inspira 로 4군데 고처주면…한글이 정상적으로 보임…버그인지..

GRUB Bootloader Themes

git clone https://github.com/ChrisTitusTech/Top-5-Bootloader-Themes
cd Top-5-Bootloader-Themes
sudo ./install.sh

CyberRE

Vimix

크롬설치..

소프트웨어 매니저 //티냅틱 패키지 관리자 ///업데이트매니저…..//터미널//크롬순

[OS]윈도우 리눅스 듀얼부팅 환경에서 시간이 다르게 보이는 문제

 윈도우와 리눅스를 듀얼부팅하는 환경에서 아래와 같이 시간이 지속적으로 바뀌는 문제를 발견했다. 윈도우에서 시간을 알맞게 세팅하고 다시 리눅스로 들어오면 리눅스의 시간이 늦어져 있고, 리눅스에서 시간을 맞추면 윈도우에서 시간이 빨라져 있었다. 그래서 이러한 이슈를 검색해 보고 해결한 결과를 포스팅하려고 한다.

1. 데비안에서 시간
2. 윈도우에서 시간

문제가 발생하는 이유

 이는 윈도우와 데비안(리눅스)의 시간설정 방식의 차이에서 발생하는 문제이다. 윈도우에서는 메인보드에 저장된 시간을 기본값으로 설정하는 반면, 리눅스에서는 GMT(Greenwich Mean Time)를 기준으로 메인보드의 시간과 현재 위치의 시차를 적용하여 시간을 설정하기 때문에 다르게 된다.

 예를 들어 메인보드의 시간이 오전1시라고 했을 때, 윈도우는 이를 그대로 가져와서 오전1시로 표시하는 반면, 리눅스에서는 GMT기준 한국의 시간은 GMT+9여서 메인보드의 시간에 9시간을 더해서 오전10시로 표시하는 것이다.

 쉽게 말해서, 같은 메인보드의 시간을 사용하는 두 개의 운영체제가 다른 시간설정 방식을 가지고 있어서 발생하는 것이다.

해결방법

 따라서 이는 윈도우의 시간 설정 방식을 리눅스의 방식으로 바꾸거나, 리눅스의 시간 설정 방식을 윈도우로 바꿔서 쉽게 해결할 수 있다.

 아래 참고 사이트에 가서 보면 알 수 있듯이 윈도우의 시간 설정 방식을 바꾸는 것은 레지스트리를 수정하는 작업이므로, 비교적으로 손쉬운 리눅스의 시간 설정 방식을 메인보드의 시간을 기준으로 표시하도록 바꾸는 방법을 알아보도록 하자.

 터미널을 실행시키고 아주 간단하게 다음 명령어를 입력해보자.

timedatectl set-local-rtc 1 --adjust-system-clock
3. 명령어 입력

 위 명령어를 실행시키면 리눅스의 시간 설정 방식은 메인모드의 시간에 의존하게 되어 윈도우와 시간차이가 사라지게 된다.

GNU GRUB2에 대하여

GRUB에 대해 알기 위해서는 먼저 부트로더가 무엇인가에 대해 알 필요가 있습니다. 부트로더는 시스템이 부팅될 때 처음으로 구동되는 프로그램으로, 운영체제가 본격적으로 구동되기 전 필요한 작업을 수행하고 운영체제 커널에서 필요한 제어 정보를 커널 프로그램에 전송하는 역할을 합니다.

GNU GRUB2는 GNU 프로젝트에서 개발하고 있는 멀티부트 지원 부트로더입니다. 이전에는 LILO를 많이 썼었지만 지금은 GRUB으로 통일되다시피 했습니다.

고급 시스템 관리자의 경우에는 GRUB와 관련된 다양한 명령을 이용해 시스템을 좀더 자유롭게 관리하겠지만 초심자의 경우라면 아래에 설명한 내용만으로도 충분할 것입니다.


GRUB 관련 파일과 디렉터리

/boot/grub/grub.cfg

GRUB의 메뉴 정보를 담고 있는 파일로, GRUB 이전 버전의 menu.lst 파일을 대체한 것입니다.

이 파일을 사용자가 직접 편집하여 적용할 수도 있지만 그러기 위해서는 적어도 셸스크립트 작성에 대한 고급 지식을 가지고 있어야 합니다.

모든 사용자가 그 정도의 지식을 가지지는 않고, 설사 지식을 가지고 있더라도 굉장히 번거로운 것은 사실이므로 일반적으로 작성 도구를 사용하게 됩니다.

위의 파일에 담긴 GRUB의 메뉴 정보 및 부팅 과정을 제어하기 위해서 일반적으로 /etc/default/grub 파일을 편집하고 update-grub 명령을 실행하여 해당 편집 내용을 grub.cfg에 적용합니다. 개발진은 이 방법을 권장합니다.

/etc/default/grub

사용자가 GRUB의 메뉴 정보 및 부팅 과정을 제어하기 위해 편집하는 파일입니다.

이 파일을 편집한다고 해서 GRUB에 바로 적용되는 것이 아니라 update-grub 명령을 실행하여 해당 편집 내용을 grub.cfg에 적용해야 합니다.

이 구성 파일은 이전에 사용된 GRUB 레거시 버전에서 사용되었던 menu.lst의 상단 섹션에 포함된 정보와 커널 라인 끝에 포함된 항목을 포함합니다.

우분투 등 리눅스를 설치하면 GRUB도 당연히 설치되며 grub 파일에 가장 일반적인 구성이 설정되어 있습니다. 그러나 해당 구성 내용이 설정가능한 모든 내용은 아니며 그외 다양한 구성을 추가로 설정할 수 있습니다.

설정 가능한 구성 항목은 다음과 같이 확인할 수 있습니다.

study@study-VirtualBox:~$ grep "export GRUB_DEFAULT" -A50 /usr/sbin/grub-mkconfig | grep GRUB_
export GRUB_DEFAULT \
  GRUB_HIDDEN_TIMEOUT \
  GRUB_HIDDEN_TIMEOUT_QUIET \
  GRUB_TIMEOUT \
  GRUB_TIMEOUT_STYLE \
  GRUB_DEFAULT_BUTTON \
  GRUB_HIDDEN_TIMEOUT_BUTTON \
  GRUB_TIMEOUT_BUTTON \
  GRUB_TIMEOUT_STYLE_BUTTON \
  GRUB_BUTTON_CMOS_ADDRESS \
  GRUB_BUTTON_CMOS_CLEAN \
  GRUB_DISTRIBUTOR \
  GRUB_CMDLINE_LINUX \
  GRUB_CMDLINE_LINUX_DEFAULT \
  GRUB_CMDLINE_XEN \
  GRUB_CMDLINE_XEN_DEFAULT \
  GRUB_CMDLINE_LINUX_XEN_REPLACE \
  GRUB_CMDLINE_LINUX_XEN_REPLACE_DEFAULT \
  GRUB_CMDLINE_NETBSD \
  GRUB_CMDLINE_NETBSD_DEFAULT \
  GRUB_CMDLINE_GNUMACH \
  GRUB_EARLY_INITRD_LINUX_CUSTOM \
  GRUB_EARLY_INITRD_LINUX_STOCK \
  GRUB_TERMINAL_INPUT \
  GRUB_TERMINAL_OUTPUT \
  GRUB_SERIAL_COMMAND \
  GRUB_DISABLE_LINUX_UUID \
  GRUB_DISABLE_LINUX_PARTUUID \
  GRUB_DISABLE_RECOVERY \
  GRUB_VIDEO_BACKEND \
  GRUB_GFXMODE \
  GRUB_BACKGROUND \
  GRUB_THEME \
  GRUB_GFXPAYLOAD_LINUX \
  GRUB_DISABLE_OS_PROBER \
  GRUB_INIT_TUNE \
  GRUB_SAVEDEFAULT \
  GRUB_ENABLE_CRYPTODISK \
  GRUB_BADRAM \
  GRUB_OS_PROBER_SKIP_LIST \
  GRUB_DISABLE_SUBMENU \
  GRUB_RECORDFAIL_TIMEOUT \
  GRUB_RECOVERY_TITLE \
  GRUB_FORCE_PARTUUID \
  GRUB_DISABLE_INITRD \
  GRUB_FLAVOUR_ORDER
study@study-VirtualBox:~$ 

 이 모든 구성 항목을 다루지는 못하고 일반적이고 대중적인 항목만을 뽑아 설명하도록 하겠습니다.

자세한 내용은 아래 링크를 참고하시기 바랍니다.

http://www.gnu.org/software/grub/manual/grub/grub.html#Configuration

/etc/grub.d/

이 디렉터리에 포함된 스크립트들은 update-grub 명령이 실행될 때 읽혀지고 이렇게 읽힌 스크립트 안의 지침들은 grub.cfg에 통합되어 적용됩니다.

study@study-VirtualBox:/etc/grub.d$ ls -1
00_header
05_debian_theme
10_linux
10_linux_zfs
20_linux_xen
20_memtest86+
30_os-prober
30_uefi-firmware
40_custom
41_custom
README
study@study-VirtualBox:/etc/grub.d$

파일명의 앞부분에 붙은 숫자가 작을 수록 높은 우선순위를 가집니다. 

/etc/grub.d/에 포함되는 대표적인 스크립트

00_header

시스템 파일 위치, 비디오 설정 및 이전에 저장한 항목과 같은 환경 변수를 설정

/etc/default/grub에 저장된 기본 설정 로드

05_debian_theme

GRUB 2 배경 이미지, 텍스트 색상, 선택 강조 표시 및 테마 설정

10_linux

사용 중인 운영 체제의 루트 장치에서 커널을 식별하고 이러한 항목에 대한 메뉴 항목을 생성

20_memtest86+

/boot/memtest86+.bin을 검색하여 GRUB 2 부트 메뉴의 옵션으로 포함

30_os-prover

os-prover를 사용하여 Linux 및 기타 운영 체제를 검색하고 결과를 GRUB 2 메뉴에 배치

40_custom

명령 실행 시 grub.cfg에 삽입될 사용자 정의 메뉴 항목을 추가하기 위한 템플릿

  /etc/grub.d/에 포함된 스크립트 파일의 예약번호

  00_*: 00_header를 위해 예약된 번호
  10_*: 네이티브 부트 항목을 위해 예약된 번호
  20_*: 서드 파티 앱을 위해 예약된 번호

  30_*: 시스템 구동과 관련하여 예약된 번호

  40_*: 40번대 이후부터는 사용자 정의 작업에 예약된 번호


GNU GRUB 화면

Ubuntu 단일 OS 메인 화면

Ubuntu – Windows 멀티 OS 메인 화면

Ubuntu용 고급 설정 하위 메뉴 화면


/etc/default/grub 파일 예시

study@study-VirtualBox:~$ cat /etc/default/grub
# If you change this file, run 'update-grub' afterwards to update
# /boot/grub/grub.cfg.
# For full documentation of the options in this file, see:
#   info -f grub -n 'Simple configuration'

GRUB_DEFAULT=0
GRUB_TIMEOUT_STYLE=hidden
GRUB_TIMEOUT=0
GRUB_DISTRIBUTOR=`lsb_release -i -s 2> /dev/null || echo Debian`
GRUB_CMDLINE_LINUX_DEFAULT="quiet splash"
GRUB_CMDLINE_LINUX=""

# Uncomment to enable BadRAM filtering, modify to suit your needs
# This works with Linux (no patch required) and with any kernel that obtains
# the memory map information from GRUB (GNU Mach, kernel of FreeBSD ...)
#GRUB_BADRAM="0x01234567,0xfefefefe,0x89abcdef,0xefefefef"

# Uncomment to disable graphical terminal (grub-pc only)
#GRUB_TERMINAL=console

# The resolution used on graphical terminal
# note that you can use only modes which your graphic card supports via VBE
# you can see them in real GRUB with the command `vbeinfo'
#GRUB_GFXMODE=640x480

# Uncomment if you don't want GRUB to pass "root=UUID=xxx" parameter to Linux
#GRUB_DISABLE_LINUX_UUID=true

# Uncomment to disable generation of recovery mode menu entries
#GRUB_DISABLE_RECOVERY="true"

# Uncomment to get a beep at grub start
#GRUB_INIT_TUNE="480 440 1"
study@study-VirtualBox:~$ 

편집 후 할 일

/etc/default/grub 파일을 변경하는 경우 나중에 ‘update-grub’을 실행하여 /boot/grub/grub.cfg를 업데이트해주어야 수정 내용이 정상적으로 적용됩니다.

study@study-VirtualBox:~$ sudo update-grub
[sudo] study의 암호: 
Sourcing file `/etc/default/grub'
Sourcing file `/etc/default/grub.d/init-select.cfg'
grub 설정 파일을 형성합니다 ...
리눅스 이미지를 찾았습니다: /boot/vmlinuz-5.8.0-44-generic
initrd 이미지를 찾았습니다: /boot/initrd.img-5.8.0-44-generic
리눅스 이미지를 찾았습니다: /boot/vmlinuz-5.8.0-43-generic
initrd 이미지를 찾았습니다: /boot/initrd.img-5.8.0-43-generic
리눅스 이미지를 찾았습니다: /boot/vmlinuz-5.4.0-52-generic
initrd 이미지를 찾았습니다: /boot/initrd.img-5.4.0-52-generic
리눅스 이미지를 찾았습니다: /boot/vmlinuz-5.4.0-48-generic
initrd 이미지를 찾았습니다: /boot/initrd.img-5.4.0-48-generic
Adding boot menu entry for UEFI Firmware Settings
완료되었습니다
study@study-VirtualBox:~$ 

위 내용은 단일 OS(ex : Ubuntu)에서 ‘update-grub’을 실행한 경우입니다.

study@study-VirtualBox:/etc/default$ sudo update-grub
Sourcing file `/etc/default/grub'
Sourcing file `/etc/default/grub.d/init-select.cfg'
grub 설정 파일을 형성합니다 ...
리눅스 이미지를 찾았습니다: /boot/vmlinuz-5.8.0-44-generic
initrd 이미지를 찾았습니다: /boot/initrd.img-5.8.0-44-generic
리눅스 이미지를 찾았습니다: /boot/vmlinuz-5.4.0-52-generic
initrd 이미지를 찾았습니다: /boot/initrd.img-5.4.0-52-generic
리눅스 이미지를 찾았습니다: /boot/vmlinuz-5.4.0-42-generic
initrd 이미지를 찾았습니다: /boot/initrd.img-5.4.0-42-generic
Windows Boot Manager에서 /dev/sda1@/EFI/Microsoft/Boot/bootmgfw.efi를 찾았습니다
Adding boot menu entry for UEFI Firmware Settings
완료되었습니다
study@study-VirtualBox:/etc/default$ 

위 내용은 멀티 OS(ex : Ubuntu – Windows)에서 ‘update-grub’을 실행한 경우입니다.


/etc/default/grub 항목 편집

GRUB_DEFAULT=n/xxxx/saved

이 항목은 기본 설정 메뉴를 지정하는 메뉴입니다. 즉, 사용자가 따로 특정 메뉴를 선택하지 않는 한 지정 시간 후에 자동으로 실행되는 메뉴를 설정하는 항목입니다.

GRUB_DEFAULT=n

이 항목의 입력값은 0과 양의 정수와 같은 숫자와 전체 메뉴 할목 인용문 또는 saved로 설정 가능합니다.

Grub 2에 설정되는 메뉴 항목들은 /boot/grub/grub.cfg의 ‘menuenv’로 지정됩니다.

grub.cfg의 첫 번째 ‘menuenv’는 GRUB_DEFAULT= 항목에서 숫자 0으로 지정되며 두 번째 ‘menuenv’는 숫자 1로 지정할 수 있습니다. 즉 Grub의 메뉴 항목들은 위에서 부터 차례대로 0, 1, 2, 3 이렇게 초항이 0이고 공차가 1인 등차수열의 숫자로 지정됩니다.

GRUB 하위 메뉴 지정

GRUB 1.99부터는 하위메뉴 구조를 도입하게 되었습니다. 예를 들어 사용자가 세 번째 주메뉴의 첫 번째 하위 메뉴를 기본 설정값으로 지정하고자 한다면 “2>0″으로 지정하면 됩니다.

이때 반드시 따옴표로 감싸주어야 합니다.

하위 메뉴를 지정해준다고 하더라도 GRUB 메뉴 화면이 바로 하위 메뉴 화면으로 진입하지는 않습니다.

만약 “2>2″로 지정한다면 GRUB 메뉴 화면에서 세 번째 주메뉴가 선택된 상태로 표시되며 그 상태에서 엔터키를 눌러 다음으로 넘어가면 하위 메뉴에서 세번째 메뉴 항목이 선택되어 있는 상태로 표시됩니다.

GRUB_DEFAULT=”xxxx”

따옴표를 포함한 정확한 메뉴 항목으로도 지정할 수 있습니다.

GRUB_DEFAULT=saved

위와 같이 지정하면 “grub-reboot” 또는 “grub-set-default” 명령을 사용하여 향후 부팅에 대한 기본 OS를 설정할 수 있습니다.

차후의 기본 부팅 OS를 설정하려면 아래의 명령어를 실행하여 지정해줍니다.

$ sudo grub-set-default N
ex) $ sudo grub-set-default 3

$ sudo grub-set-default "정확한 메뉴 문자열"
ex) $ sudo grub-set-default "Ubuntu, Linux 2.6.32-15-generic"

위 명령에서 N은 Grub 부팅 메뉴 항목의 지정 숫자입니다.

각 메뉴의 정확한 메뉴명과 순서는 아래 명령을 실행하여 확인할 수 있습니다.

$ grep menuentry /boot/grub/grub.cfg
study@study-VirtualBox:~$ grep menuentry /boot/grub/grub.cfg
if [ x"${feature_menuentry_id}" = xy ]; then
  menuentry_id_option="--id"
  menuentry_id_option=""
export menuentry_id_option
menuentry 'Ubuntu' --class ubuntu --class gnu-linux --class gnu --class os $menuentry_id_option 'gnulinux-simple-61dcad89-696f-4823-a41f-f38ab0d82100' {
submenu 'Ubuntu용 고급 설정' $menuentry_id_option 'gnulinux-advanced-61dcad89-696f-4823-a41f-f38ab0d82100' {
	menuentry '리눅스 Ubuntu가 있는, 5.8.0-44-generic입니다' --class ubuntu --class gnu-linux --class gnu --class os $menuentry_id_option 'gnulinux-5.8.0-44-generic-advanced-61dcad89-696f-4823-a41f-f38ab0d82100' {
	menuentry 'Ubuntu, with Linux 5.8.0-44-generic (recovery mode)' --class ubuntu --class gnu-linux --class gnu --class os $menuentry_id_option 'gnulinux-5.8.0-44-generic-recovery-61dcad89-696f-4823-a41f-f38ab0d82100' {
	menuentry '리눅스 Ubuntu가 있는, 5.8.0-43-generic입니다' --class ubuntu --class gnu-linux --class gnu --class os $menuentry_id_option 'gnulinux-5.8.0-43-generic-advanced-61dcad89-696f-4823-a41f-f38ab0d82100' {
	menuentry 'Ubuntu, with Linux 5.8.0-43-generic (recovery mode)' --class ubuntu --class gnu-linux --class gnu --class os $menuentry_id_option 'gnulinux-5.8.0-43-generic-recovery-61dcad89-696f-4823-a41f-f38ab0d82100' {
menuentry 'UEFI Firmware Settings' $menuentry_id_option 'uefi-firmware' {
study@study-VirtualBox:~$

menuentry 옆의 따옴표 안의 내용이 메뉴의 정확한 이름입니다.

grub-reboot 명령은 다음 부팅에 대해서만 기본 부팅 항목을 설정하며 설명 내용은 위와 같습니다.

GRUB_SAVEDEFAULT=true

위 문구를 추가하면 마지막으로 사용한 메뉴 항목이 차후 부팅 메뉴로 설정됩니다.

이 구성은 기본 OS를 설정하기 위해 명령을 실행할 필요가 없습니다.
GRUB 2 메뉴에서 메뉴 항목을 수동으로 선택할 때마다 해당 항목이 차후 부팅 시의 기본 OS가 됩니다.
/boot 디렉토리가 LVM 파티션 또는 RAID에 있는 경우 이 구성은 작동하지 않습니다..
이 구성은 위에서 설명한  GRUB_DEFAULT=saved도 같이 설정되어야 합니다.

GRUB_HIDDEN_TIMEOUT=n

설정된 시간 안에 사용자가 키를 누르지 않으면 메뉴가 나타나지 않습니다.

설정값이 0인 경우

시스템에 설치되어 있는 OS가 하나만 존재하는 경우 Grub 부팅 메뉴는 표시되지 않으며 시스템은 바로 기본 OS로 부팅됩니다.
시스템 OS가 하나만 설치되 있음에도 불구하고 Grub 부팅 메뉴를 표시하려면 이 구성줄의 시작 부분에 # 기호를 붙여 주석처리하고 GRUB_TIMEOUT= 구성의 설정값을 양의 정수(1 이상의 자연수)로 설정해주어야 합니다.
설정값이 0으로 설정되어 있음에도 불구하고 부팅 메뉴를 표시하려면 시스템이 부팅되자마자 Shift키를 누르고 있으면 됩니다.  GRUB 2서 부팅 과정 중에 중에 SHIFT 키가 눌린 것을 확인하면 메뉴가 표시된다.

설정값이 N(양의 정수)인 경우

부팅 과정이 일시 중단되고 지정한 수의 초 시간동안 빈화면 또는 지정된 스플래시 이미지가 표시됩니다.

지정된 시간이 지나면 부팅 과정이 진행되며 이때 메뉴는 표시되지 않습니다.

지정된 시간 내에 아무 키나 누르면 메뉴가 표시됩니다.

이때 메뉴는 GRUB_TIMEOUT= 구성에서 설정한 시간 동안 메뉴가 표시됩니다.

GRUB_HIDDEN_TIMEOUT_QUIET=true/false

GRUB_HIDDEN_TIMOUT 기능을 사용할 때 빈 화면에 카운트다운 타이머를 표시할지 결정합니다.

설정값을 true로 설정하면 카운터가 표시되지 않습니다.

설정값을 false로 설정하면 GRUB_HIDDEN_TIMEOUT 값 기간 동안 빈 화면에 표시됩니다.


 GRUB_TIMEOUT_STYLE=menu/hidden

이 옵션을 설정하지 않거나 ‘menu’로 설정하면 GRUB에서 메뉴를 표시한 다음 기본 항목을 부팅하기 전에 ‘GRUB_TIMEOUT’에 설정된 시간 초과가 만료 될 때까지 기다립니다.

키를 누르면 타임 아웃이 중단됩니다.

이 옵션이 ‘countdown’또는‘hidden’으로 설정되어 있으면 메뉴를 표시하기 전에 GRUB는 ‘GRUB_TIMEOUT’에 설정된 타임 아웃이 만료될 때까지 기다립니다.

이 시간 내에 ESC를 누르면 메뉴가 표시되고 입력을 기다립니다.

메뉴 항목과 관련된 핫키를 누르면 관련 메뉴 항목이 즉시 부팅됩니다.

이러한 상황이 발생하기 전에 시간 초과가 만료되면 기본 항목이 부팅됩니다.

‘카운트 다운’의 경우 남은 시간을 한 줄로 표시합니다. 


GRUB_TIMEOUT=n

OS가 부팅되기 전 메뉴가 표시되는 시간(초)을 설정합니다.
이 구성은 GRUB_HIDDEN_TIMOUT 구성이 만료될 때 시작됩니다.
이 값을 -1로 설정하면 사용자가 선택할 때까지 메뉴가 표시됩니다.
단일 OS 시스템에서는 기본적으로 이 설정이 사용되지 않고 메뉴가 표시되지 않습니다.

부팅때마다 항상 메뉴를 표시하려면 아래와 같이 구성해주어야 합니다.

# GRUB_HIDDEN_TIMEOUT=0
GRUB_TIMEOUT=1 이상의 정수

GRUB_DISTRIBUTOR=`lsb_release -i -s 2> /dev/null || echo Debian`

메뉴 항목에서 설명이 포함된 이름을 검색합니다. (Ubuntu, Xubuntu, Debian 등)

더 많은 정보를 제공하는 메뉴 항목 제목을 생성하는 데 사용됩니다.

GRUB_CMDLINE_LINUX_DEFAULT=”splash/quiet splash/…”

이 줄은 모든 항목을  ‘linux’ 줄(GRUB 레거시 행의 “kernel” 행)의 끝 부분에 가져 옵니다. 

이때 항목은 일반 모드 끝에만 추가됩니다.
부팅 프로세스를 텍스트로 확인하시려면  “quiet splash”를 제거하십시오.

축약된 텍스트 출력과 함께 Grub 이미지를 보시려면 “splash”를 사용하십시오.

GRUB_CMDLINE_LINUX=””

일반모드와 복구 모드 모두에 설정값을 리눅스 커맨드 라인 끝에 덧붙입니다.

이것은 특정 옵션의 인수를 커널에 전달할 때 사용됩니다.

#GRUB_TERMINAL=console

그래픽 터미널을 비활성화하려면 주석 처리(#)를 제거하십시오.

GRUB 2 메뉴가 너무 크거나 읽을 수 없는 경우 도움이 될 수 있습니다.

GRUB_HIDDEN_TIMEOUT 기능을 사용할 때도 도움이 될 수 있습니다. 

#GRUB_DISABLE_LINUX_UUID=”true”

GRUB가 “root=UUID=xxx” 매개 변수를 Linux에 전달하지 않도록하려면 주석 처리를 제거하십시오.
검색 라인은 여전히 UUID를 사용합니다.

이 옵션이 활성화되면 Linux 라인은 /dev/sdXY 규칙을 사용합니다. 

#GRUB_GFXMODE=640×480

GRUB 2는 사용자에게 최상의 화면 결과를 보여줄 것이라 여기는 메뉴 해상도를 자동으로 결정해 적용합니다.

이 줄의 주석 처리(#)를 제거만 한다면 해상도가 640×480으로 설정됩니다.

주석처리 제거와 함께 설정값을 다른 GRUB 호환 설정 해상도로 변경할 수도 있습니다.

특정 해상도로 설정할 때 색상 비트 심도를 추가하여 지정할 수도 있습니다.

예를 들면 1280x1024x24 또는 640x480x32입니다.

이 설정은 부팅되는 운영 체제의 해상도가 아닌 부팅 메뉴 디스플레이에만 적용됩니다.

사용자는 여러 해상도를 추가 할 수도 있습니다. GRUB 2가 첫 번째 항목을 사용할 수없는 경우 다음 설정을 시도합니다. 설정은 쉼표로 구분됩니다. 

예 : 1280x1024x16,800x600x24,640×480.

당연한 말이지만 스플래시 이미지를 사용하는 경우 최상의 결과를 얻으려면 해상도 설정과 스플래시 이미지 크기가 호환되어야합니다.

update-grub을 실행할 때 “not found” 메시지를 표시하는 경우 색상 비트 심도를 추가하거나 변경해보십시오.

GRUB 2에서 사용할 수 있는 해상도는 GRUB 2 명령 줄에 videoinfo를 입력하여 표시할 수 있습니다.

기본 GRUB 2 메뉴 화면이 표시 될 때 “c”를 입력하면 명령 줄에 액세스 할 수 있습니다.

이 행이 주석 처리(#)되거나 해상도를 사용할 수없는 경우 GRUB 2는 /etc/grub.d/00_header에 의해 결정된 기본 설정을 사용합니다.
GRUB 1.99 (Natty)에서는 해상도가 지정되지 않은 경우 GRUB에서 ‘최적’해상도를 선택합니다. 

#GRUB_DISABLE_RECOVERY=true

  “Recovery” 모드 커널 옵션이 메뉴에 나타나지 않도록하려면 주석을 제거하십시오).

하나의 커널에 대해서만 “복구”옵션을 원하면 /etc/grub/40_custom에 특수 항목을 만드십시오. 

#GRUB_INIT_TUNE=”480 440 1″

주석 기호(#)를 제거하면 GRUB 2가 Grub 2 메뉴 표시 직전에 단일 신호음을 재생할 수 있습니다.

피치/지속 시간 값을 확장하여 더 복잡한 곡을 작곡하여 재생할 수 있습니다.

형식 : tempo [pitch1 duration1] [pitch2 duration2] …

템포는 한 번 설정되면 모든 지속 시간 설정에 적용됩니다.

소리의 지속시간은 60/tempo의 결과입니다. tempo가 60이고 duration이 1이면 1초의 신호음이 울립니다.

tempo가 480이고 duration 이 1이면 0.125 초의 신호음이 울립니다.
긴 곡을 만들면 메뉴 표시가 지연됩니다.

온라인 설명서는 터미널에 info grub –index-search play를 입력하여 사용할 수 있습니다.

GRUB_BACKGROUND=

‘gfxterm’그래픽 터미널에 사용할 배경 이미지를 설정합니다. 

배경 이미지를 설정하고자 하는 경우 이미지의 전체 경로를 적어줍니다. 

이 옵션의 값은 부팅시 GRUB에서 읽을 수있는 이미지 파일이어야 합니다.

GRUB에서 지원하는 이미지 파일 확장자 형식은 .png, .tga, .jpg 또는 .jpeg입니다.. 

화면에 맞게 필요한 경우 이미지 크기가 조정됩니다. 

자세한 내용 및 기타 옵션은 위의 스플래시 이미지 구성을 참조하시면 됩니다.

GRUB_DISABLE_OS_PROBER=true

일반적으로 grub-mkconfig는 설치된 경우 외부 os-prober 프로그램을 사용하여 동일한 시스템에 설치된 다른 운영 체제를 검색하고 적절한 메뉴 항목을 생성합니다. 

만약 설정값을 “true”로 지정하면 update-grub 명령을 실행하는 동안 Windows, Linux, OSX 및 Hurd를 포함한 운영 체제에 대한 다른 파티션의 os-prober 검사를 비활성화합니다. 즉, GRUB가 메뉴에 os-prober의 결과를 추가하는 것을 막는데 사용됩니다.

conky 설치

1
sudo apt-get install conky

2 소프트웨어 매니저에서 conky-all 설치..

https://github.com/brndnmtthws/conky 설명에…

If you don’t have jq and curl installed, go to https://github.com/brndnmtthws/conky/releases/latest and fetch the latest AppImage. Then:

$ chmod +x ./conky-x86_64.AppImage
$ ./conky-x86_64.AppImage -C > ~/.conkyrc
$ ./conky-x86_64.AppImage

하면 된다는데…

  1. 유튜브에서 conky-manager설치하는법…

1) wget http://launchpadlibrarian.net/340091846/realpath_8.26-3ubuntu4_all.deb https://github.com/teejee2008/conky-manager/releases/download/v2.4/conky-manager-v2.4-amd64.deb
2) sudo apt install conky
3) sudo dpkg -i realpath_8.26-3ubuntu4_all.deb conky-manager-v2.4-amd64.deb
4) sudo apt install -f

그리고 컨키매니저 실행하면.됨…

한글깨질때…3번 보고 설치한 것임..

홈폴더에서 숨김파일 보기 하고..
.conky아래 Gotham(사용하는것)폴더내의 고담을 데디터로 열어서..

폰트에 GE Inspira 를 GE_Inspira 로 4군데 고처주면…한글이 정상적으로 보임…버그인지..